
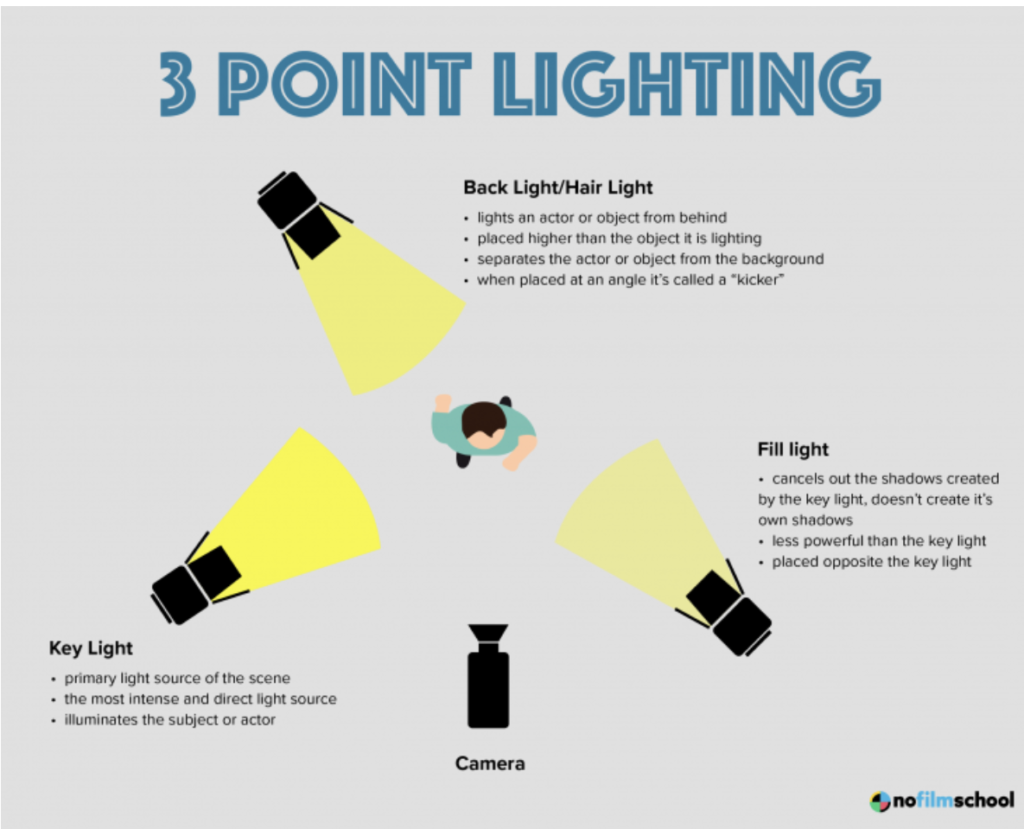
In our previous topic we explored the art of lighting by capturing portrait photos using a single light. We also covered the difference between hard light and soft light and how to achieve each of them. In this topic we explore one of the most common lighting setups which is 3 point lighting. 3 point lighting consists of a key light, fill light, and back light.
 https://www.youtube.com/watch?v=pBt8qdO03-k
This 3 point lighting portrait photography assignment requires a total of 6 photos. The requirements are as followed.
- Setup your 3 point lighting according to the diagram above. (They do not have to be the same kind of lights)
- Take 1 photo with just the key light
- Take 1 photo with just the fill light
- Take 1 photo with just the back light
- Take 3 photos with all 3 lights combined. Make sure to experiment with different brightness, angles, heights, and distances, and diffusions in order to get different looks.
- Once you have taken many photos using several different lighting placements and you feel that you have 6 “good” photos then move to post processing (on a computer using Camera RAW).
- From Camera RAW save each photo as a jpg.
- Create a Google Slides presentation with a title slide and 6 additional slides (1 for each of the 6 photos)
- Label each slide with either key, fill, back, or 3 point
- When finished submit your slides to Google Classroom.