In other lessons from our Photography module we learned about the importance of lighting in photography. Our focus was primarily on natural light from the sun. When shooting indoors we worked with whatever room lights or hall lights were already on. Now we will move our photography into the studio where we have much more control over the lighting and the way it shapes our photos.
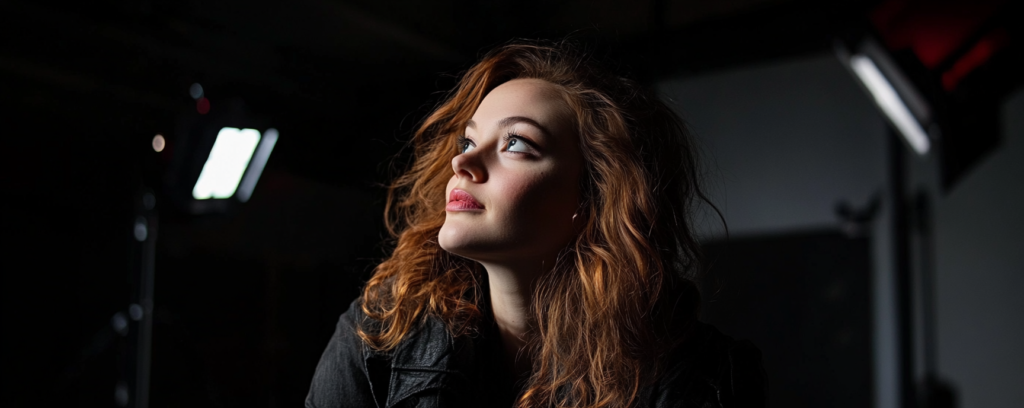
We are going to start our studio portrait photography by using just one single light. The simplicity and minimalism of using a single light will allow us to really see what the light is doing and how much it is affected by things like angle, height, distance, brightness, and diffusion.
We are going to focus on 5 single light techniques:
- Butterfly
- Rembrandt
- Short light
- Broad light
- Split light

The way we will approach our first studio portrait session will be a process of discovery. Instead of simply saying “place your light at this or that height, distance, angle, etc., the key is to experiment with variations, placing the light closer, then further, shift angle, adjust height, etc, and pay extremely careful attention to how each shift affects the photo. You don’t want to just memorize a bunch of predetermined settings and arrangements. You will get the most benefit to starting with a few key fundamentals and then learning from direct experience. This is an opportunity to establish a working relationship with light and the way it works. It is perhaps the most important relationship to develop in your journey as lighting will be your partner in every single photo or video you take.
This first studio portrait photography assignment requires a total of 5 photos.
We want to focus solely on how different lighting affects the photos. Therefore, for this experiment we want to set the camera and leave the settings unchanged for the session. Set your camera at:
- Aperture f4.5
- Shutter speed 1/200
- ISO 800
- Use the Godox SL300 III light
- Move the light around and take several pictures with the light at different angles, distance, and heights. Adjust the brightness accordingly.
- Check your photos carefully after each shot. Is the photo good (in your opinion)? What can you try in order to make it better?
- Once you have taken many photos using several different lighting placements and you feel that you have 5 “good” photos then move to post processing (on a computer using Camera RAW).
- From Camera RAW click "Open" to open in Photoshop. Go to File > Export > Export Quick as PNG
- You may submit all 5 photos as Files directly to Google Classroom.